Hello folks! Today we’ll learn how to connect with a Node.js debugger to a local Docker container using Visual Studio Code.
GitHub Repository
If you want to give a quick look at the project solution or maybe you feel lost, click on the button below to be redirect on the GitHub Repository. Remember to switch on the docker-pills-1 branch.
Context
I’m currently working on a micro service architecture project which is built using a Docker Compose file. Sometimes using simple console.log("I'm here! What's going on?") calls cannot give us enough informations on why our containerized app is not working. The best way is to debug our project, but how? Let’s do it together step by step, shall we?
Prerequisites
Node.js Application
Use Visual Studio Code to open your problematic Node.js application which gives you headhaches or maybe clone the project solution.
Dockerfile
Create a Dockerfile named Dockerfile.development and place it inside your project folder. The Dockerfile we will be using is this one:
1
2
3
4
5
6
7
8
9
10
11
FROM node:alpine

EXPOSE 3000

WORKDIR /app
COPY package.json .
COPY package-lock.json .
RUN npm ci
COPY . .

CMD ["npm", "run", "debug"]
Docker Compose
Create a Docker Compose file named docker-compose.development.yml and place it inside your project folder. You can start with a simple Docker Compose file such as this one below:
1
2
3
4
5
6
7
8
9
10
version: "1"

services:
  docker-pills-1:
    build:
      context: .
      dockerfile: Dockerfile.development
    ports:
      - 3000:3000
      - 9228:9229
With the entry 9228:9229 we create a bind connection between the Docker host machine port 9228 and the Docker container port 9229. The port 9229 is the default Node.js debugging port from wich the application will listen from the incoming debugger while the port 9228 is the one we will use to connect with Visual Studio debugger.
Create the launch.json file
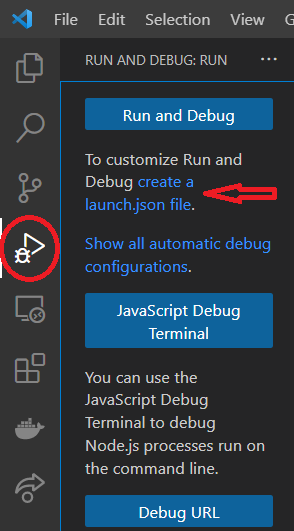
To create the launch.json file just click on the Run and Debug icon and then click on create a launch.json file.
A pop up window will open, click on VS Code Extension Development.
If the VS Code Extension Development option is not available, you can click on Node.js and then remove that configuration. What we only need is the launch.json file.

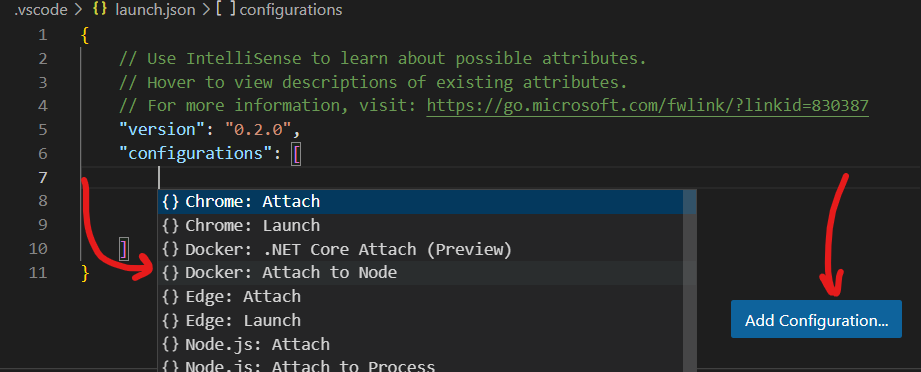
The launch.json file will open. Now you can click on the Add Configuration… button and select Docker: Attach to Node option.
Override port inside configuration
The default Node.js debugger is the 9229 port. It’s possible to change it using the port field inside the configuration object. We will be using the 9228 port. The configuration object will end up like this:
1
2
3
4
5
6
7
8
    "configurations": [
        {
            "type": "node",
            "request": "attach",
            "name": "Docker: Attach to Node",
            "remoteRoot": "/usr/src/app",
            "port": 9228
        }
Package.json
Inside the package.json, right under the debug script, there is a parameter called --inspect=0.0.0.0. With this parameter a Node.js process will listen for a debugging client. The default port, not explicitly specified, is the 9229 port. It’s possible to change the port modifing the parameter like so --inspect=0.0.0.0:1234. Normally, when working with dockerized application, it’s not necessary to change this port. If you want to change it and you choose the 1234 port, just remember to change it also in the Docker Compose file like so:
1
2
3
4
5
6
7
8
9
10
version: "1"

services:
  docker-pills-1:
    build:
      context: .
      dockerfile: Dockerfile.development
    ports:
      - 3000:3000
      - 9228:1234
If you need more informations about the Node.js debugger, please use the official documentation at this link.
Debug the dockerized app
Now it’s all set. Add some break points in your code, start your Docker Compose file and click on the Run and Debug button. Now choose the Docker: Attach to Node option and click the green arrow.

Happy debugging!